One bash script to rule them all!
This post is part of a larger series that my team and I wrote to share interesting outcomes of a Data Science project we did during the last few months. In this article we will cover an approach to structure any project where bash files can serve multiple purposes without code duplication.
Engineering fundamentals
For any development projects we are building, we need rules to set baseline of engineering best practices. What we will cover here is everything related to code quality to ensure these checks are done at the right time in the process.
What does “code quality” mean?
Code quality can be very subjective based on developers, their experience and their knowledge in the technology used. However, there are 3 areas where subjectivity does not apply, and these checks are, most of the time, automatic:
- Unit tests,
- Code coverage of these unit tests,
- Linting.
Although the 2 first one are pretty obvious, the last one can be trickier. Here is a definition of linting from Wikipedia:
lint, or a linter, is a static code analysis tool used to flag programming errors, bugs, stylistic errors, and suspicious constructs. The term originates from a Unix utility that examined C language source code.
So linting is basically ensuring the respect of best coding practices of the language used. Note that linting also apply to non-code, such as Markdown.
And finally, for the “more” subjective approach, code review is also a very important step in the process. This step is, unlike the others, a manual step as code is reviewed by another Software Engineer before it is merged to the shared branch (that can be of course the main one, but not always).
When do we need to run those checks?
Continuous integration
In our whole development life cycle, the most important moment where these checks need to run is during our Continuous Integration. One of the core engineering best practices is to have a common source control repository:
- the source repository can be Git in Azure DevOps,
- when Git is in the cloud, it can be GitHub, Azure DevOps or others,
- Azure DevOps has two possible version control engines: Git or Team Foundation Version Control
For the rest of the this post I will assume that you are comfortable with Continuous Integration and pull requests. A high-level definition of a pull request from Wikipedia would be:
A pull request is a request by one user to merge a branch of their repository fork into another repository sharing the same history.
So, as a developer, I create a PR (pull request) to merge my code to an upstream branch. That means that “my code” will move from my local development environment to the remote one, hence, making it available to the rest of the developers (or the rest of the world if the project I am contributing to is available to all). Hmm, I think this would be a good timing to run these automatic checks :)
This is where the Continuous Integration (CI) practice of DevOps will be applied. By creating a PR, a CI pipeline starts (or Action if you’re using Github) - and this pipeline executes the automatic tests we’ve seen above. If one of them fails, the PR fails, and the developer needs to fix the issue.
If the PR validation passes, another developer needs to “approve” it manually. This is the code review part (and of course, all of this is not mandatory, these are just settings and policies to activate).
As soon as my peer approves the PR, the code can be merged to the targeted branch, either manually or automatically (in Azure DevOps, there is an auto-complete flag that can set to merge a PR once it is validated)
We will now focus on the automatic tests and see how we can optimize them with a minimum impacts on developers.
How to ensure that these tests pass before creating the PR?
As a developer, I want to make sure that these tests are ok before submitting my PR. Depending on the technology used, I can run locally my unit tests on a terminal:
# For dotnetcore project
/> dotnet test MyProject

# For Python project
/> pytest $PATH

# etc ...
The commands above will only run tests - what about code coverage or linting checks. These are other commands to run (or extra parameters to add to these commands).
I could write a bash file to execute all these commands - but would I commit it in the repo for all developers, or would I keep it for myself? And would I ensure that the options uses are the same that my CI will use?
This is where, we could have “one bash file to rule them all”!
Let’s see how to implement it!
Real life example
As mentioned before, this post is a return of experience of a Data Science project where the technology used was Python - so for the rest of this post I will use Python as main language. However, these concepts can be applied to any technology used. Only underlying commands will have to be adapted.
Prerequisites
In another post of this series, we have seen how to use Dev Containers to ensure that everyone is using the same local environment. This container can already comply with Python dependencies required for these automatic tests:
pytest==6.2.2
pytest-cov==2.11.1
flake8==3.8.4
Versions used can be obsolete when reading this article, you can find these packages’ latest versions on PyPi.
pytest and pytest-cov will be used to handle unit tests and code coverage while flake8 will be used as a linter check.
There is also another important prerequisite: we are going to use a lot bash for our automation. In order to be able to run bash files, your development environment has to be one of the following:
- A Linux based Dev Containers for VSCode. This is my preferred approach: each developers can share the same environment while working on any kind of workstation where you can run VScode & Docker (so basically Windows 10, MacOS and most of the Linux distribution),
- If you do not want to use Dev Containers, your workstation must be able to run natively bash, hence you will need either:
- A workstation running Linux (any distribution would do),
- A workstation running MacOS,
- A workstation running Windows 10 with the Windows Subsystem for Linux installed. WSL2 starts in parallel of Windows 10 a Linux system (without GUI, just terminal based) - if you are not familiar with it I strongly encourage you to learn more about it.
Let’s now move to the code part!
Overall architecture
Here is below a simple Python project:
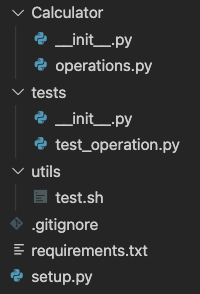
It is a highly advanced calculator, with one function add in operations.py module:
def add(x: int, y: int) -> int:
    """
    Adds two integers and returns the sum.
    """
    return x + y
Under folder tests, we can find one test for this function:
from Calculator import add

def test_add_ok():
    assert add(2, 3) == 5
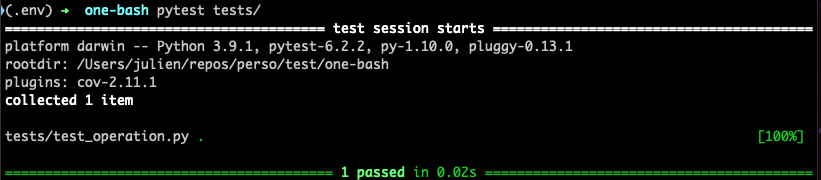
If I want to lunch this test, I can execute in a terminal:
pytest tests/
This will output my test result.
However, I cannot see the percentage of code covered by this test. To have this information, my command must become:
pytest tests/ --cov Calculator --cov-report term
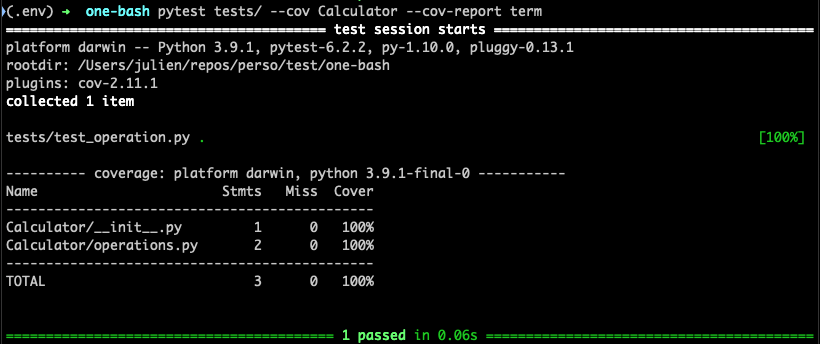
I can see now the percentage of code covered by my tests.
In order for a CI pipeline (or Github Action) to pick up these outputs, we will have to write in the pipeline the following command:
pytest tests/ --doctest-modules \
        --junitxml=pytest-results.xml \
        --cov=Calculator \
        --cov-report=xml
so that output will be dumped in files so that they can be added to the pipeline outcome. Here is below how it looks like on Azure DevOps:
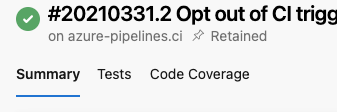
What we can note here is the call to pytest is almost the same whether it runs “locally” or in the CI Pipeline. The only difference is for a pipeline we need to dump output files - which we do not need when running the command locally. But we do not care: these files can be generated, we only need to ensure they are excluded from source control (.gitignore).
One bash file to rule them all
In order to simplify developers’ life while ensuring code quality is met, we will create instead a simple bash file in our project - under utils/ folder, called test.sh This file will be committed and will be part of the code available to all:
set -e
repoRoot="$( cd "$( dirname "${BASH_SOURCE[0]}" )/.." >/dev/null 2>&1 && pwd )"

pytest "$repoRoot"/tests --doctest-modules \
        --junitxml=pytest-results.xml \
        --cov="$repoRoot"/Calculator \
        --cov-report=xml --cov-report=term
The only difference is that we generate the repoRoot variable to ensure the correctness of the path whether we are on our local environment or on a DevOps agent (the container that executes the CI pipeline or Github action)
With this approach, the same piece of code can be used by developers on their local environment. So, as a developer I can run anytime:
./utils/test.sh
to make sure my code meets expected code quality.
The pipeline itself will also call this script! Below, here is a basic CI pipeline for Azure DevOps that calls this script:
trigger:
  branches:
    include:
    - "master"
  paths:
    include:
    - src/*
    - tests/*

pool:
  vmImage: 'ubuntu-18.04'

steps:
- bash: |
    set -e
    utils/test.sh
  workingDirectory: $(Build.SourcesDirectory)
  displayName: Python Pytest

- task: PublishCodeCoverageResults@1
  inputs:
    codeCoverageTool: 'Cobertura'
    summaryFileLocation: '$(Build.SourcesDirectory)/coverage.xml'
    pathToSources: '$(Build.SourcesDirectory)/Calculator'
    failIfCoverageEmpty: true

- task: PublishTestResults@2
  inputs:
    testResultsFormat: 'JUnit'
    testResultsFiles: '$(Build.SourcesDirectory)/pytest-results.xml'
    failTaskOnFailedTests: true
For a Github action so syntax would almost be the same.
As we can see above, the first task executes our bash file, the second and third publish the test and code coverage results into the pipeline output (so tabs, as seen above, can be shown).
Wait, you spoke about linting also
I did - and the approach is the same!
Let’s first create a bash file that calls Flake8:
#!/bin/bash
# Execute flake8 linter
#
# executable
#

set -e
appDir="$( cd "$( dirname "${BASH_SOURCE[0]}" )/../Calculator" >/dev/null 2>&1 && pwd )"
testsDir="$( cd "$( dirname "${BASH_SOURCE[0]}" )/../tests" >/dev/null 2>&1 && pwd )"

python -m flake8 \
        --exclude .git,__pycache__, "$appDir" "$testsDir"
With this script, I can test both my application source folder Calculator and the tests folder:
./utils/linter.sh

And by the way, I have 3 “flake8” errors … that means my PR would fail!
As we did for the unit tests, we can now call this script from the pipeline, and have both our linter and unit tests executed:
(...)
- bash: |
    set -e
    utils/linter.sh
    utils/test.sh
  workingDirectory: $(Build.SourcesDirectory)
  displayName: Python Checks
(...)
I did not specify any configuration for Flake8. For instance, I could remove some checks that Flake8 is making by default. To do so I need to create a .flake8.cfg file and exclude rules and append it to the
python -m flake8command. So again, by using the same piece of code for a local run or a CI run, all the rules that I set/removed are executed. There will not be any surprises for our developers once they create a new PR.
One more thing …
As a developer, I want things to be simple. Remembering a bunch of utils scripts to call can be confusing. Here is an approach we took that helped a lot: we’ve centralized all of our utils scripts calls into a Makefile. We could see a makefile as a single entry point where custom commands can be run - and they can also be cascaded.
Let’s create a new file called Makefile at the root of our project:
SHELL=/bin/bash

# Run python linting validation
linter:
	. ./utils/linter.sh

# Run python tests
test:
	. ./utils/test.sh
As you can see above, we are specifying steps, and each step call one of our bash file.
So now, I can simply execute in my terminal:
make test
# or
make linter
Easier to remember, nah?
I can also combine actions together:
SHELL=/bin/bash

# Run python linting validation
linter:
	. ./utils/linter.sh

# Run python tests
test:
	. ./utils/test.sh

check: linter test
and run
make checks
to have all the checks running in a single command. My terminal will output any errors.
In conclusion
We have seen in the article the power of bash, and, with one common file, how we can have all of our code quality checks done at the right time: for developers while they develop (either by calling directly the bash file or via makefile) and for the CI pipeline to ensure these same checks pass.
Here is what I would consider the takeaway:
- Set rules and control with minimum constraints (we hate constraints)
- Automate as much as you can (we hate manual work)
- Onboard your developers with these tools and how to use them (we hate not to know)
If you are interested, I have uploaded on Github this sample project that could serve as a baseline for any new Python-related project. Obviously, this logic could also be applied to other languages.
If you want more technical insights on this project, as I have only covered a small part of it, you can go there. You can alternatively reach out to me using my social media information found at the bottom left corner of this blog.